When manufacturing high-precision fabricated parts and machinery, it is important to verify that a component conforms to the dimensions and tolerances specified by the design engineer. Dimensional inspection ensures the quality, and functionality of each part before it moves through the production process. The type of dimensional inspection device used for a particular application depends on a number of factors, including:
- The level of accuracy required
- Whether or not the object can be touched during the measurement process
- The physical and surface characteristics of the object
- The transparency or opaqueness of the object
Dimensional Inspection Equipment
Dimensional Inspection Tools are Categorized into 6 types:
Hand Tools
These devices are the most basic, universal type of dimensional measurement equipment. Hand tools remain very useful for the majority of dimensional inspection applications. Dial indicators, digital calipers, micrometers and tape measures will often be your best option as they are highly portable, readily available and affordable.
Pneumatic Gauging
Also known as air gauges, these tools utilize the restriction of air, and the resulting change in flow or pressure to measure a dimension, usually an outside diameter or hole. Air gauging is a fast, non-contact inspection method and is generally specified for workpieces with tolerances of 0.005″ or smaller. The resolution and repeatability of the measurement can be in the millionths of an inch. Part-specific tooling is required for many applications, so air gauges are typically used to measure production parts that are produced on a regular basis.
Coordinate Measuring Machines (CMMs)
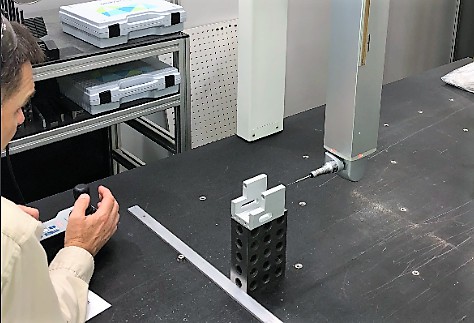
These range from lightweight portable arms, to large, heavy machines with granite structures that require special foundations and controlled environments. In most cases, a contact probe is programmed or manually moved until it touches the surface to be measured. The CMM’s computer converts the physical position to a digital location within the system’s multi-axis coordinate system. The cost, work envelope, accuracy and repeatability of these systems vary greatly; however, some CMMs can cost upwards of a million dollars and measure large parts to an accuracy of a few microns. Touch probes cannot be used with objects that have an elastic surface, surfaces that are too delicate or are clean to touch during the measurement process. There are non-contact optical probes available for many modern CMMs that can be used in these situations.
Optical Systems
These systems vary in size, magnification and accuracy. Whether the precision fabrication system is a desktop-size measuring microscope or a large optical comparator, they utilize light and optics to determine a dimension based off of the object’s profile within the instrument’s field of view. These systems can also be used to compare an object to a desired standard shape or dimension by using an overlay or measuring reticle.
Light-Based Systems
Another category of non-contact inspection uses structured light (LED) or laser line triangulation to make measurements on the workpiece. Structured light scanners take a sequence of images with different patterns of light projected onto the object surface in order to create a full 3D point cloud of the stationary object geometry. If the object moves significantly during the data acquisition process, errors in results can occur. Ambient light can also have a significant effect on the performance of these systems. Laser line triangulation scanners collect a series of profiles from the laser line as the object moves past the sensor’s field-of-view. 3D smart sensors with built-in software can then be used to automatically assemble the multiple profiles into a complete 3D map of the object surface. Ambient light is less of an issue; however, laser safety is a concern.
Vision-Based Measuring Systems
These non-contact measurement instruments employ a charge-coupled device (CCD), light, lenses and analytical software to produce and evaluate a high-resolution image. Edges are found automatically by the system and accuracies on the micron scale can be achieved. Vision-based systems are often used in quality control applications that require a high level of accuracy and precision, while producing fast and reliable results.
Dimensional Inspection Solutions by KTC
KTC can provide highly specialized precision fabrication solutions for your project’s needs, whether you’re in the market for design and build services or build-to-print manufacturing, our team can ensure that dimensional inspection and quality control are integrated at every step. Find out what we can do for you.
